ChirpStack V3 Connector
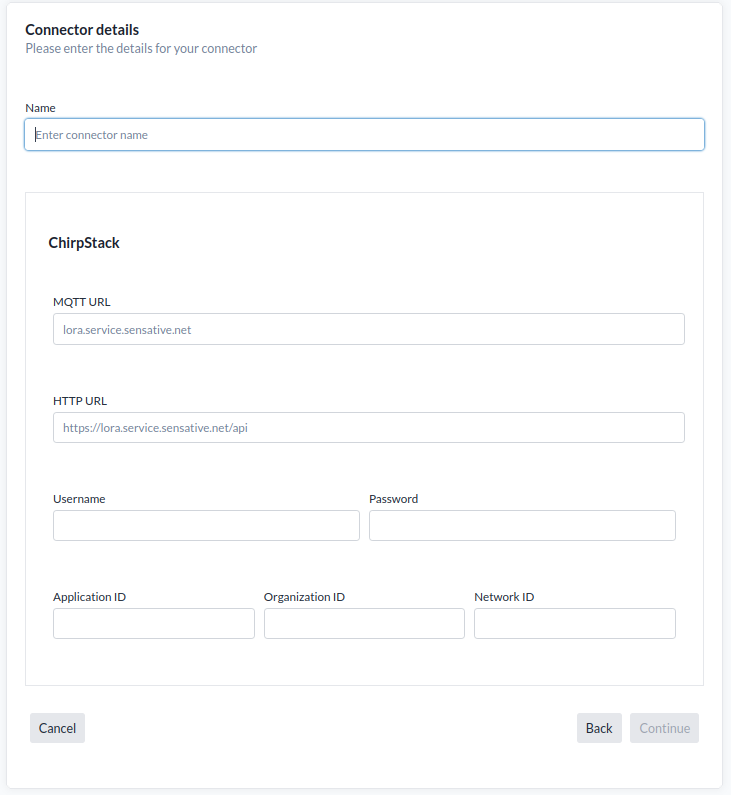
Connector details ChirpStack
The ChirpStack V3 connector allows the platform to provision devices and via MQTT subscribe to device updates from a ChirpStack V3 LoRaWAN server. This automates the ChirpStack integration, enabling full device management directly within Yggio. Supported operations include:
- Provisioning new devices
- Subscribing to device updates
- Deleting devices
Requirement: MQTT broker added to ChirpStack v3, such as Mosquitto.
Required Information
To set up a connection to a ChirpStack V3 server, provide the following:
- a. ChirpStack MQTT broker URL: lora.service.sensative.net (Sensative ChirpStack V3 LoraWAN server)
- b. ChirpStack API URL: https://lora.service.sensative.net/api (Sensative ChirpStack V3 LoraWAN server)
- c. Username: Your MQTT/API username
- d. Password: Your password
- e. Application ID: The application ID to use in ChirpStack
- f. Organization ID: The Organization ID to use in ChirpStack
- g. Network Server ID: The Network Server ID to use in ChirpStack
⚠️ ChirpStack V3 must be preconfigured with all of the details listed above, and the API user must have an Admin role to perform these operations. If you receive a 40x error response, it's likely due to wrong credentials, wrong URL or insufficient access rights. Make sure all the settings are reviewed and adjusted accordingly.
Configure ChirpStack
Start With Setting Up the Access
Log in to your ChirpStack server and create an API user account. If needed, also create a new Organization and Application. If you don’t have your own LoRaWAN server but want a private setup, please reach out to your support contact.
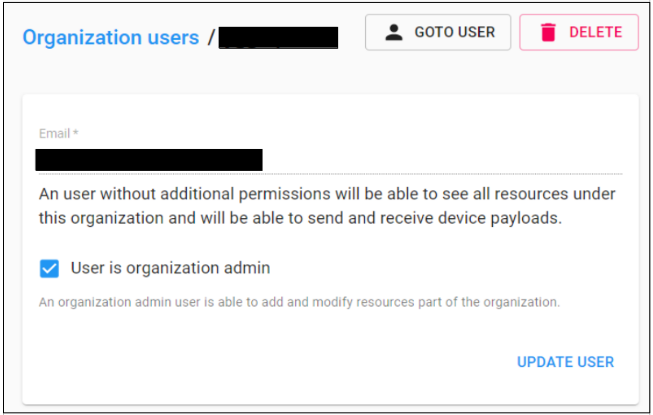
- a. The account must be linked to both an Organization and an Application to enable device provisioning.
- b. The user must have the role
Adminin the Organization
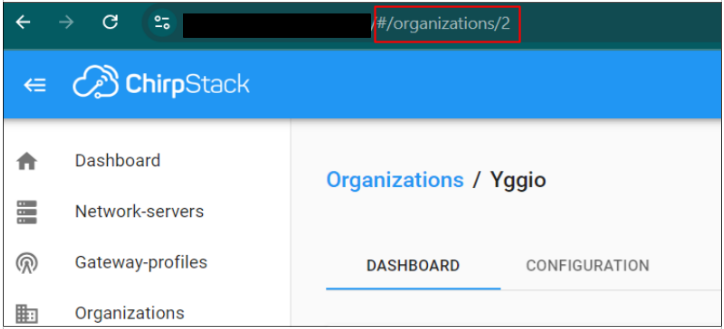
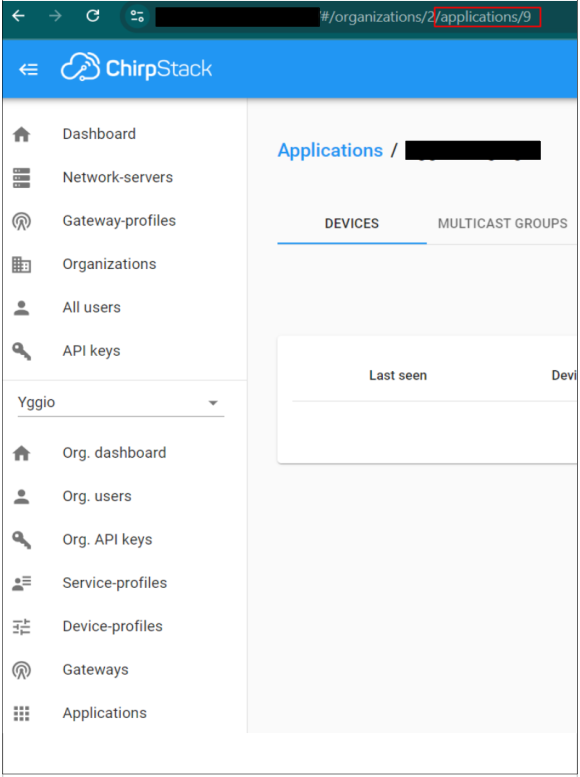
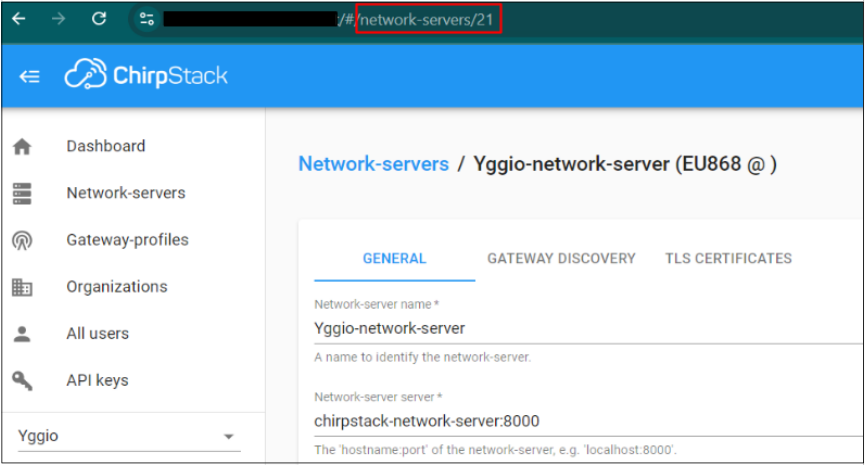
Note that ID for Organization and Application is available in the browser URL
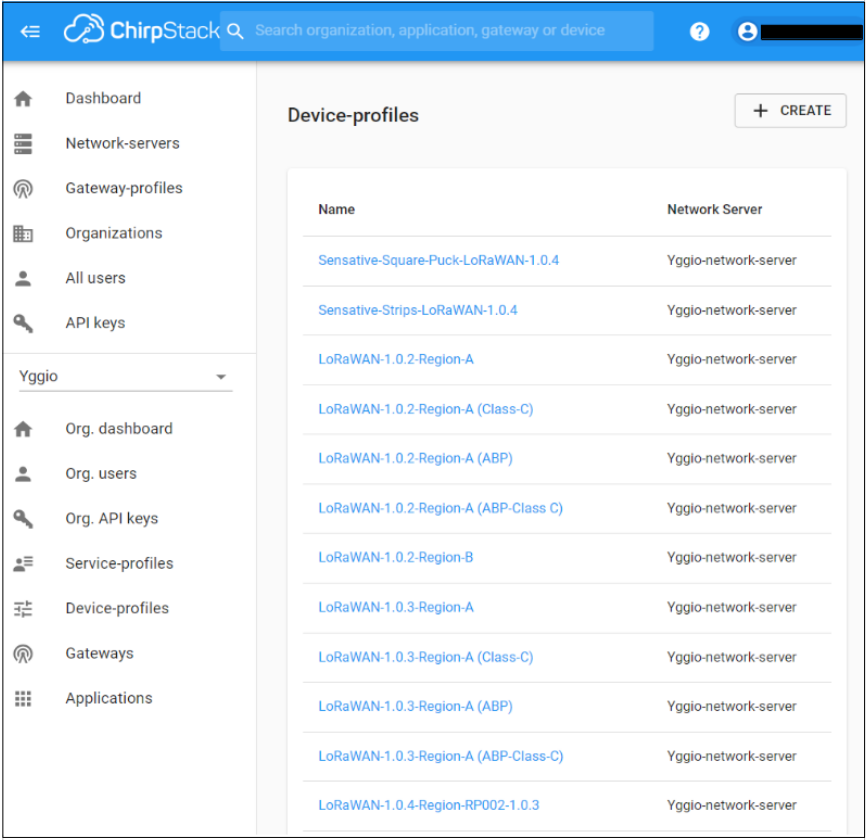
Create Device Profiles
In ChirpStack, you need to create Device Profiles. These define the LoRaWAN settings to use, including whether OTAA is supported, the LoRaWAN version (commonly 1.0.2, 1.0.4, or 1.1), Regional Parameters (e.g., Region A, B, or a specific RP version), and whether the device uses Class A or Class C. Additional parameters may also apply.
Device Profiles are important—if the settings don't match the actual device, LoRaWAN messages may be lost, and actuators won't respond instantly unless Class C is enabled.
Once configured, the Device Profiles will appear in the IoT platform when creating a new LoRaWAN device.
Setting Up the Connector
Once the ChirpStack configuration is complete, proceed to the IoT plattform:
- Navigate to Connectors → New Connector → ChirpStack V3 Connector
- Fill in the required fields with the collected information.
Note that the Network Server ID, Organization ID, and Application ID can all be found in your browser’s URL bar. Below is an example for the Network Server, and the images above provide further detail.
Verifying the Connector
-
The platform will automatically verify the connection when the connector is created,
but this does not guarantee full functionality. -
To perform a full verification:
- Create a device in the platform using the ChirpStack connector.
- After creation, open the device page.
- Go to Tools and check the Synchronize status — it should not say
"never". - Click the Synchronize button manually to confirm it works successfully.
- Log in to ChirpStack and confirm that the device has been provisioned.
- Trigger (or wait for) the device’s first uplink.
- Ensure that the uplink is received and properly decoded by the platform.
Multi-Account Setup
There are two main ways to integrate ChirpStack with the IoT platform:
1. Users need access to ChirpStack
Mirror parts of the IoT platform's organization structure in the ChirpStack server. Users can be given ChirpStack accounts to view LoRaWAN-specific connection parameters and create new Device Profiles.
In this setup, create one connector per organization.
2. Users do not need access to ChirpStack
Use a flat structure in ChirpStack, where all devices are managed in a single shared location.
Only one connector is required in the IoT platform and can be shared with all users who need to add devices.
Note: ChirpStack V3 does not support billing, so billing must be handled through the IoT platform.
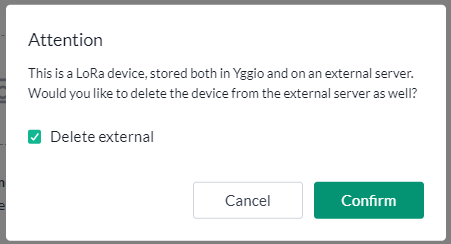
⚠️ Important:
If a device is deleted from the IoT plattform, it will by default also be deleted and decommissioned from the ChirpStack LoRaWAN server. To avoid this, make sure to opt out of the delete action when prompted during the confirmation dialog.
Troubleshooting
I get a 40x error
- This typically indicates an issue with your URL, credentials, or access rights. Eliminate these one at a time:
- Double-check the URL—make sure there’s no trailing
/at the end. - Verify that the username, password, and access permissions are correct.
- Double-check the URL—make sure there’s no trailing
- Tip: Use the ChirpStack Swagger UI. Get a JWT token from ChirpStack UI after login, enter the JWT token, try to create a device, and see if the request succeeds.
I get no uplink in the IoT platform
- Go to the sensor in the ChirpStack user interface.
- Confirm that the device actually has sent uplinks.
- Confirm that the MQTT URL in the connection is accurate and that no trailing
/at the end
I have an API Gateway between me and ChirpStack — what should I do?
- Ensure the API gateway gives access to both the ChirpStack API and the ChirpStack MQTT broker.
- When creating the connector, update the API and MQTT URLs to point to the gateway endpoints that route correctly to ChirpStack.
I get a 40x error when trying to import or create devices — what could be the issue?
- A 40x error means ChirpStack is rejecting the request. This is usually caused by:
- Incorrect credentials
- Wrong URL
- Missing or incorrect access rights on the ChirpStack side
- Go through the example setup images and verify the following:
- Username, password, API URL
- Network Server ID, Organization ID and Application ID
- Also confirm:
- The ChirpStack API user account is marked as an Admin User in the correct organization