Device Updater
The Device Updater is the tool an installer uses while standing in front of the device. It does two things: it confirms the device has come alive on the network, and it records what the device is and where it ended up.
It is built for a phone. Everything is one guide, one screen at a time, so it can be worked through one-handed on a ladder.
It updates devices that already exist in Yggio. Devices are created first, in bulk, with Batch install, and the installer then fills in what could only be known once the device was physically mounted. Nothing about the device's identity is changed here - the DevEUI, the connector and the keys are set at install and stay as they are.
The guide
- Search for the device.
- Choose what to update.
- Work through the steps you chose, one per screen.
- Finish, and press Update another device to start again on the next one.
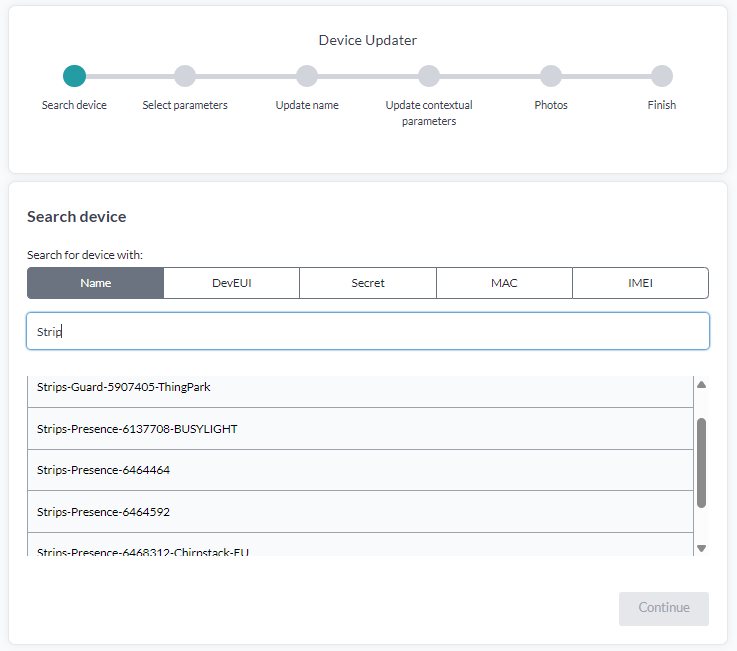
Search for the device
Pick what you are searching by, then type it. Five identifiers are offered:
| Search by | Use it for |
|---|---|
| Name | The device name in Yggio |
| DevEUI | LoRaWAN devices |
| Secret | Generic devices |
| MAC | BLE devices |
| IMEI | Cellular devices, such as Sodaq |
The search matches on a substring rather than the whole value, so part of a DevEUI is enough. It is case-sensitive, so capitals matter. Matching devices are listed below the field, up to 25 at a time - if what you want is not there, type more of the identifier rather than scrolling.
Select the device and press Continue.
Has it joined?
From the moment you leave the search step, the guide checks whether the device has joined the network and shows Not yet joined or Joined as you work. It rechecks every five seconds and stops once the device has joined.
This is the part worth waiting for. A device that never shows Joined is not on the network, and that is far cheaper to discover while you are still at the installation than after you have left.
The check applies to devices on a ChirpStack connector. On other connectors there is no join to observe, and no status is shown.
Choose what to update
Tick the things you want to fill in. Only the ticked steps appear, in the order below.
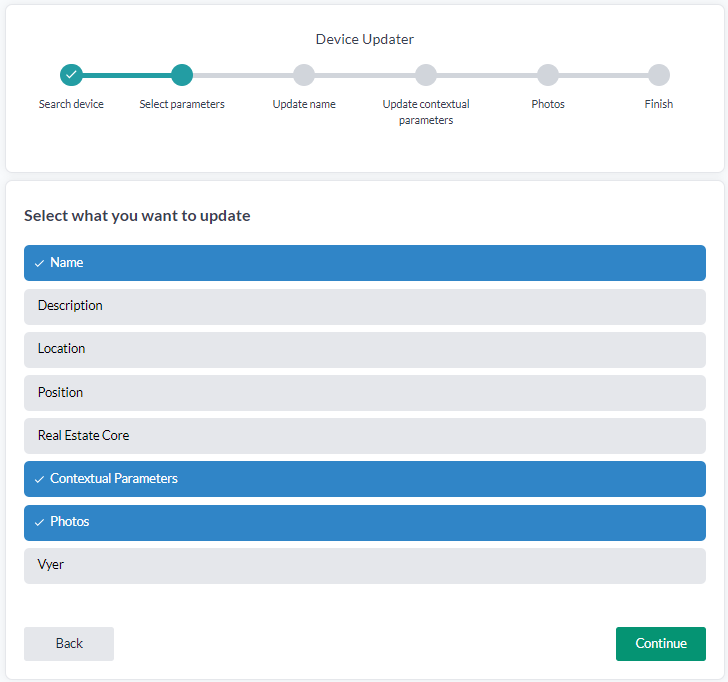
| Step | What you set |
|---|---|
| Name | The device name |
| Description | Free text |
| Location | The location the device belongs to |
| Position | Latitude and longitude |
| Real Estate Core | The device's place in a Real Estate Core model |
| Contextual Parameters | Your own metadata, as name and value pairs |
| Photos | Pictures of the installed device |
| Vyer | The Vyer site, building, story and space |
You can tick as many as you need. A typical round is Name, Position and Photos.
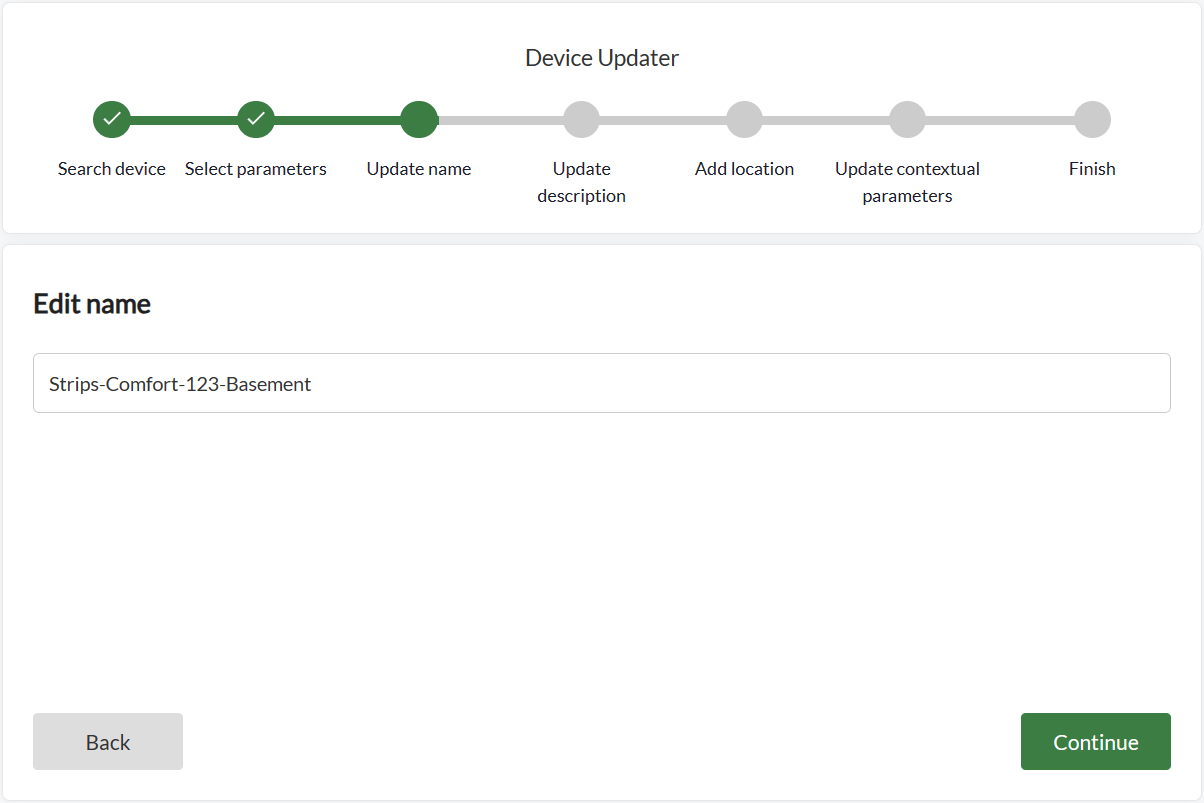
Name and description
Two plain text steps. The name is what everyone will see in the device list afterwards, so name the device for where it is and what it does, not for its model.
Location
Adds the device to a location. The same step also removes it from a location, which is what you want when a device has been moved rather than newly installed.
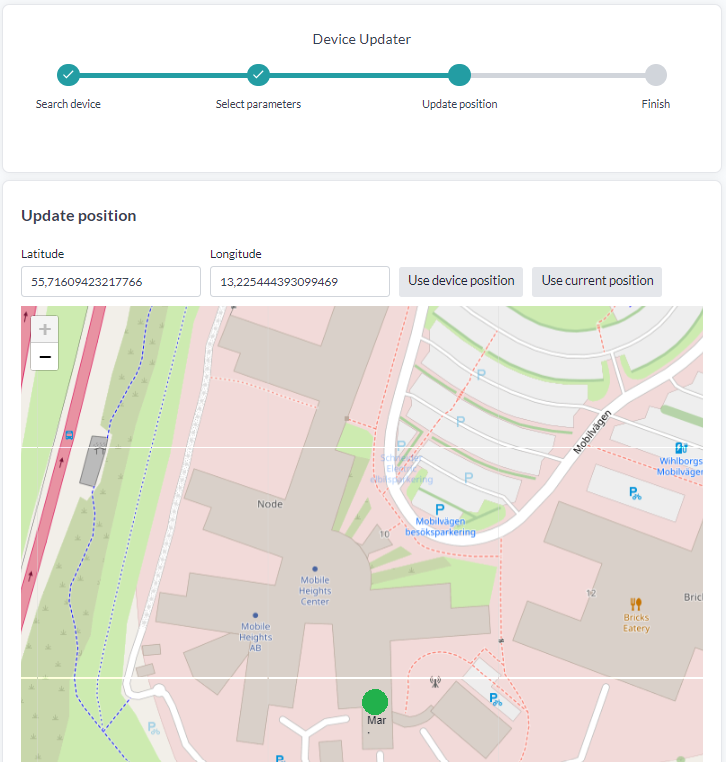
Position
Sets latitude and longitude, which is what puts the device on the map.
Three ways to set it:
- Type the coordinates.
- Use current position takes them from the phone you are holding. Standing next to the device, this is the quick and accurate option.
- Use device position takes the position the device itself has reported, for a device that knows where it is.
Real Estate Core
Places the device in a Real Estate Core model, against a Real Estate Core connector. Use it where the building itself is modelled in REC and the device has to be attached to the right part of it.
Contextual Parameters
Your own metadata as name and value pairs - which floor, which room, who installed it, an asset tag. Yggio stores and indexes these but does not interpret them, and they are searchable and filterable afterwards. See Contextual parameters.
Installation is the moment you know these things, which is the reason the step is here.
Photos
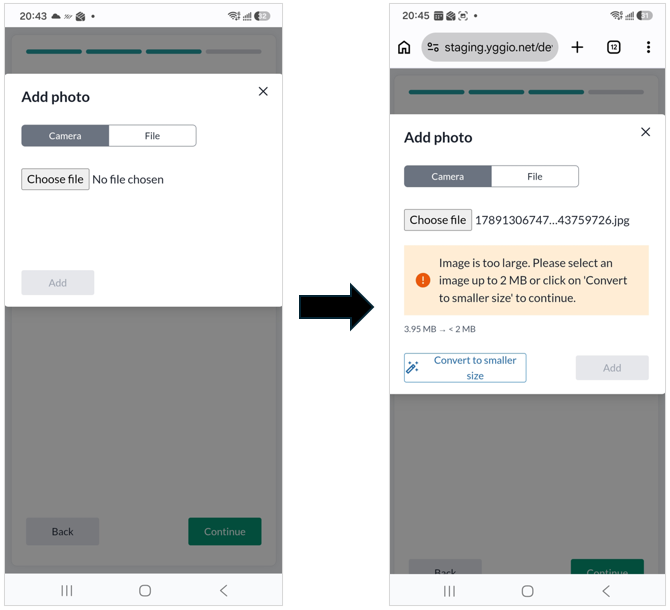
Uploads pictures of the installed device. A photo of the box on the wall is often what tells the next visitor which device this is, years later. On a phone, the Camera tab takes the picture there and then; File picks one you already have. A picture may be at most 2 MB - a larger one is refused with a Convert to smaller size button that shrinks it for you.
Vyer
Records the device's place in a Vyer model: Site, then Building, then Story, then Space, each list filtered by the one above it. Device, the sensor object in the space itself, can be picked as well and is optional - a space with no sensor object in Vyer is still provisioned, and only the device-level details below are skipped.
The step needs a Vyer token. If the device's connector already carries one, the guide says Token detected and uses it; otherwise enter one. Press fetch to load the Vyer data before continuing - the step will not let you past until it has it. The token stays on the connector and never reaches the browser; Yggio makes the calls to Vyer itself.
Finishing the step writes back to Vyer:
- On the device object, its name is set to the device's Yggio name, alongside the devEui, the device model, the installation year, and the photos added in the photos step of this run. Transferring the photos here saves adding them in Vyer separately.
- On the device object and the space, the temperature, relative humidity, CO2 and battery voltage readings, from then on, as the sensor reports them.
Running the step again for a device that is already provisioned updates those datafields rather than duplicating them, and leaves the installation year as first recorded. Photos are not re-sent - only the ones added during the current run are transferred, so a re-run without new photos adds none.
Two things about the sequence number:
- Keep sequence number retains the number the device already holds.
- Choosing a different building issues a new one, and the step says so before you continue.
A building has to be selected, because the sequence number is reserved against it.
Finish
The last screen confirms the device is updated. Update another device returns to the search step with everything cleared, ready for the next one.
To change the same fields on many devices at once from a desk rather than on site, use Select many or Batch update.