Lesson 2.4 Organizations
The platform's organization Manager allows you to create and manage an organizational structure, facilitating the management of different user accounts assigned to handle various types or parts of resources.
This lesson will teach users how to navigate and manage the Organization Manager, including working with units, resources, and user access rights. Users will learn to assign permissions, share resources, and oversee members efficiently within the organizational hierarchy. To complete this lesson, you will need the Organization Admin role and a few colleagues with some owned nodes to observe how their accounts are affected when sharing resources and moved within the organization.
Summary of Organization Manager
The Organization Manager organizes users, units, and resources using hierarchical access rights, similar to file system permissions. Units behave like folders, and resources (IoT nodes, connectors, credentials, or reports) are like files. An organization admin can map an organization to one or several AD groups if a SAML IDP (Identity Provider) is used.
Key Principles
- Root Unit: Top-level organizational unit; all others branch from it.
- Subunits: Nested units forming a tree structure.
- Inheritance: Access rights set at a parent unit are inherited by subunits and their resources.
- Explicit Rights: Permissions can be overridden at any unit or assigned directly to resources.
User and Member Management
- Admins can create, add, or remove members, set passwords, and enable 2FA.
- Members can be added to multiple organizations.
- Owners can add themselves as members of their organization.
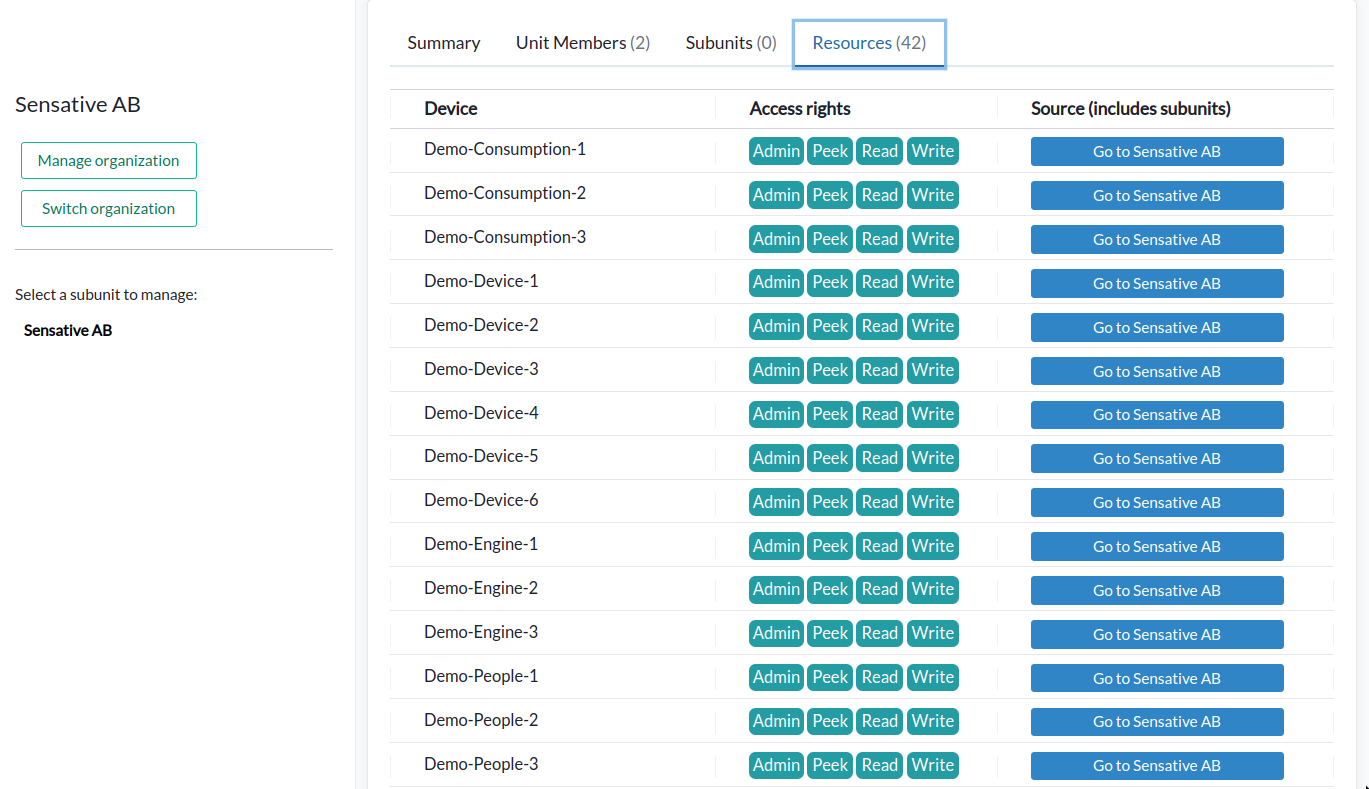
Resources and Access
- Users can view resources they own or inherit access to, labeled accordingly.
- Admins can review all users’ access rights for easier onboarding.
- Resource permissions include:
- Admin: Full control, including deleting and setting rights.
- Write: Write data to resources.
- Read: View and read data.
- Peek: Access data invisibly, mainly for connectors.
Units and Sharing
- Units allow setting access rights at different hierarchy levels.
- Managers can administer units, members, and resources for the unit and all subunits.
- Sharing resources makes them accessible to all users with access to the unit.
- Users can only be assigned to one unit; reassigning moves them like relocating files in a folder.
For full details, see the User Guide, the Organization Manager.
Explore the Organization Manager
Create a New Organization
Start by creating a new organization.
Note: You must not already be a member of another organization to do this.
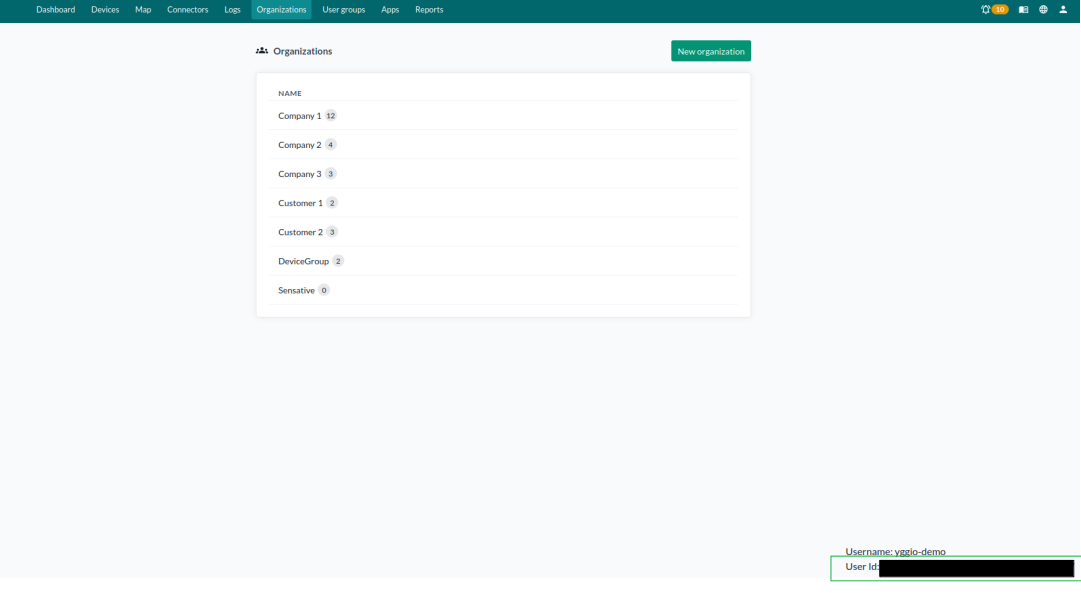
Go to Organizations and click Create Organization, then choose a suitable name.
Add a New Member
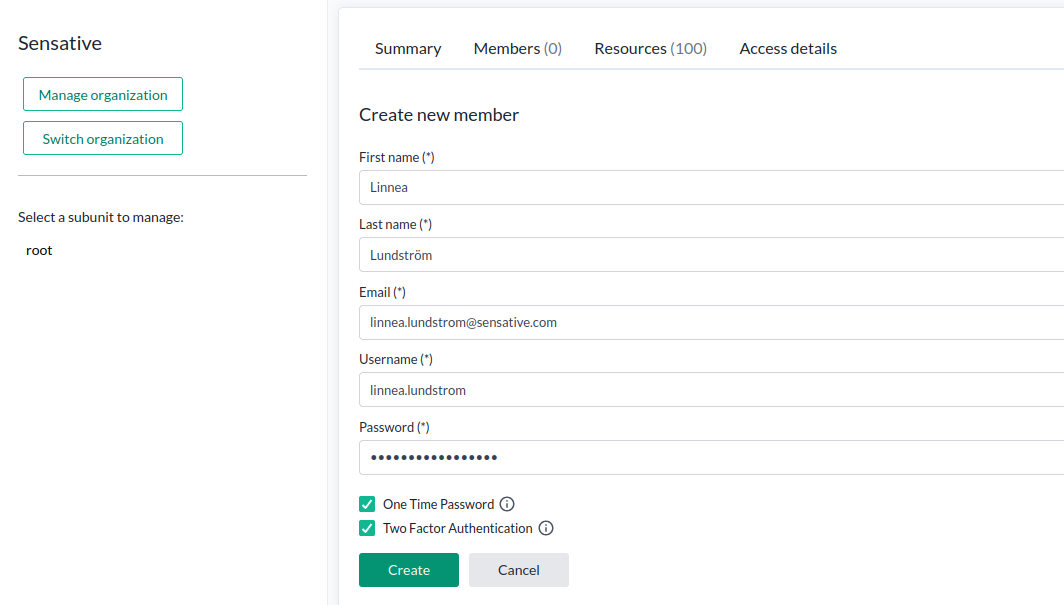
- Open your new organization, go to Members, and click Create new member.
- Configure the member details. You can enable 2FA and One-Time Password (OTP) for extra security.
| Parameter | Description |
|---|---|
| First Name | Enter the user's first name. |
| Last Name | Enter the user's last name. |
| Used for login, password recovery, and verification. | |
| Username | Typically the same as the email address. |
| Password | Can be a temporary password; users can be forced to change it at first login. |
- When ready, press Create.
Tip: Use a simple temporary password during setup; users will be prompted to change it at their first login.
Add an Existing Member
You can also add an existing platform user if you know their user-id.
- Obtain the User ID from an organization you manage, or ask the user to provide it.
- Go to Members, select Add existing user, and input the User ID.
- Add yourself as well using the same method — your user ID is shown at the bottom right of the organization list page.
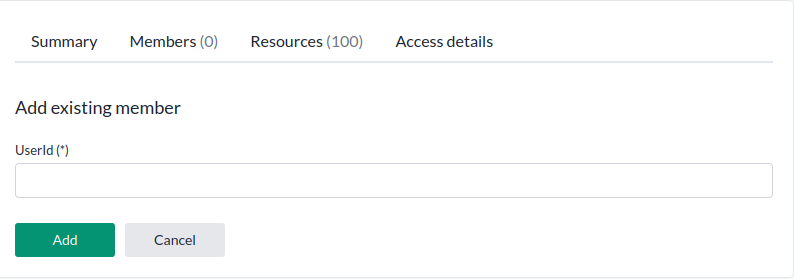
Then click Add.
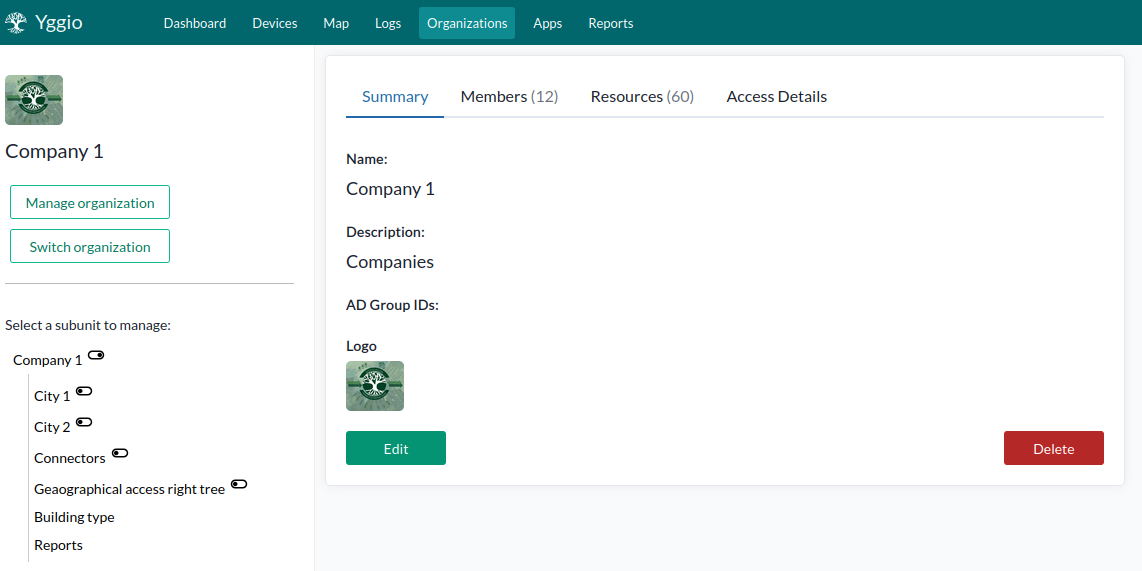
Manage Subunits
Once your users are created, you can organize them in subunits to simplify access management.
- Select the root unit in the hierarchy and rename it to match your organization.
- Go to the Subunits tab, click Add, and create a new subunit. It will appear in the tree view.
- Continue adding subunits to build a clear, hierarchical structure.
Manage Resources
Next, assign members within the hierarchy and experiment with resource access:
- Add yourself to the top of the tree with full access rights — this ensures access to all shared resources.
- Add your members to different branches, share their resources, and refresh your Device List to see the changes.
- Try editing or accessing your members’ resources.
- Remove your Admin and Write rights, then try again to observe the effect.
- Experiment by adjusting access rights and moving members between units.
- Check the
Resourcestab at different branches in the tree.
Note: Access rights are inherited down the hierarchy but can be overridden by assigning custom permissions at lower levels.
When done with the training, remove all members from the test organization and delete it.
Branding
As an Organization Admin, you can rebrand the platform to match your organization’s identity.
Yggio supports full theming, including login, logout, and account pages (if self-hosted).
Ask your instructor to enable branding features for practice.
Tip: For custom color palettes, use an online color generator to easily create matching shades.
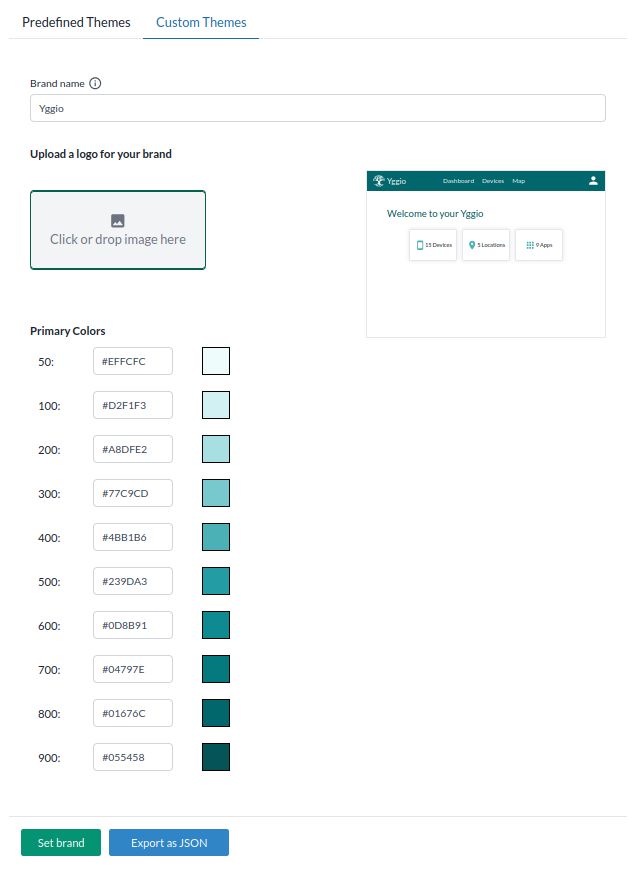
| Theme type | |
|---|---|
| Predefined | Can be the defult Yggio theme, red, blue, purple or grey |
| Custom | You can customize the look of your Yggio by changing the colors, logo and title in the navigation bar. You can upload a logo that will be displayed in the header and in your organization. |
Branding examples
![]()
Blue branding
![]()
Red branding
![]()
Purple branding
![]()
Grey branding
Q&A
- Question
- Answer
Why use One Time Password?
Using a one-time password (OTP) is strongly recommended for security reasons. It allows you to use the same simple initial password for all new members, simplifying onboarding. Since only the user can access their own email during verification, the process remains secure.
Here’s how it works:
The user must first verify their email address. Once verified — confirming that the correct person is signing in — the system requires the user to update their password. This ensures strong security while keeping the onboarding process smooth and user-friendly.