Actility ThingPark DX Connector:
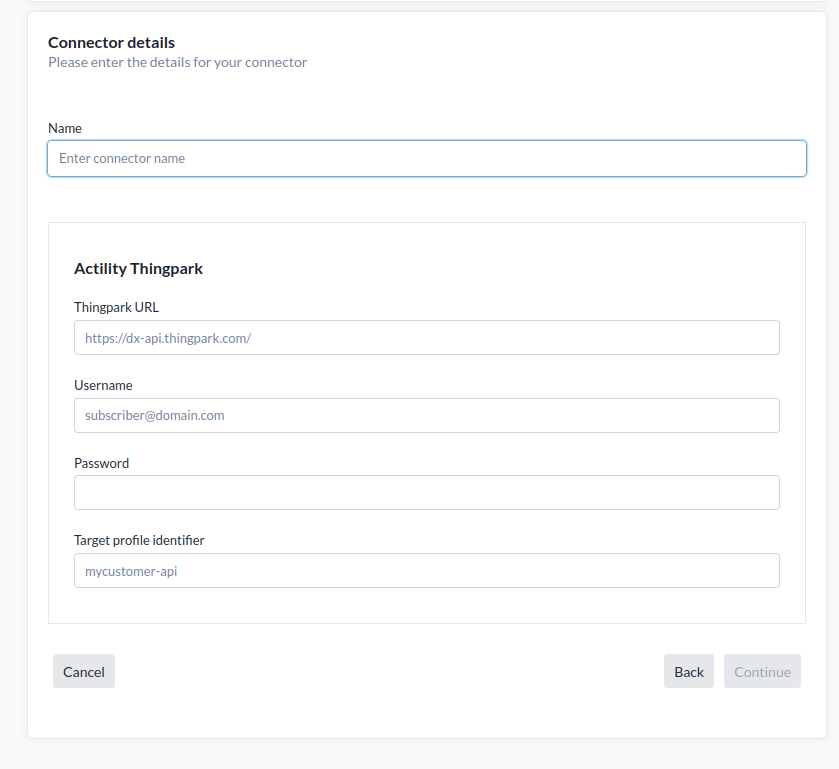
Actility ThingPark Integration via DX API
The platform integrates with Actility ThingPark using the DX API.
- Default DX API URL:
https://dx-api.thingpark.com/⚠️ This URL may differ depending on your ThingPark provider.
What the Connector Does
Using the DX API, the connector allows the platform to:
- Provision new devices
- Import existing devices
- Instruct ThingPark to publish device data to Yggio’s MQTT broker
Authentication & Connectivity
The DX API uses OAuth 2.0 authentication. The following credentials are required:
- DX API URL – Default:
https://dx-api.thingpark.com/, but may vary - Username – Valid for the domain of the selected profile
- Password – Corresponding password for the username
- Target Profile Identifier – Specifies the ThingPark domain and operator account used for API operations
Target Profile Identifier
This represents a combination of a ThingPark domain (e.g.,mycustomer.thingpark.com) and the operator account used to perform API operations and other parameters related to token generation.
Your ThingPark provider will supply this identifier and it must be pre-configured within the DX platform.
Setting Up MQTT Export (ThingPark → Yggio)
To publish data from ThingPark into Yggio, you must configure MQTT Export on both ends.
Required Steps:
-
Contact Sensative to:
- Set up your MQTT username
- Set up your MQTT password
- Decide your base topic
-
Configure Thingpark MQTT Export with the following values:
| Field | Value |
|---|---|
| Hostname | mqtt.staging.yggio.net:8883 |
| Published Topics | [your base topic]/things/{DevEUI}/uplink |
| Subscribed Topics | [your base topic]/things/{DevEUI}/downlink |
| Protocol | SSL |
| CA Certificates | None required unless using a custom/on-prem ThingPark installation |
| MQTT Username | Provided by Sensative |
| MQTT Password | Provided by Sensative |
Table of what MQTT information that needs to get updated with correct information
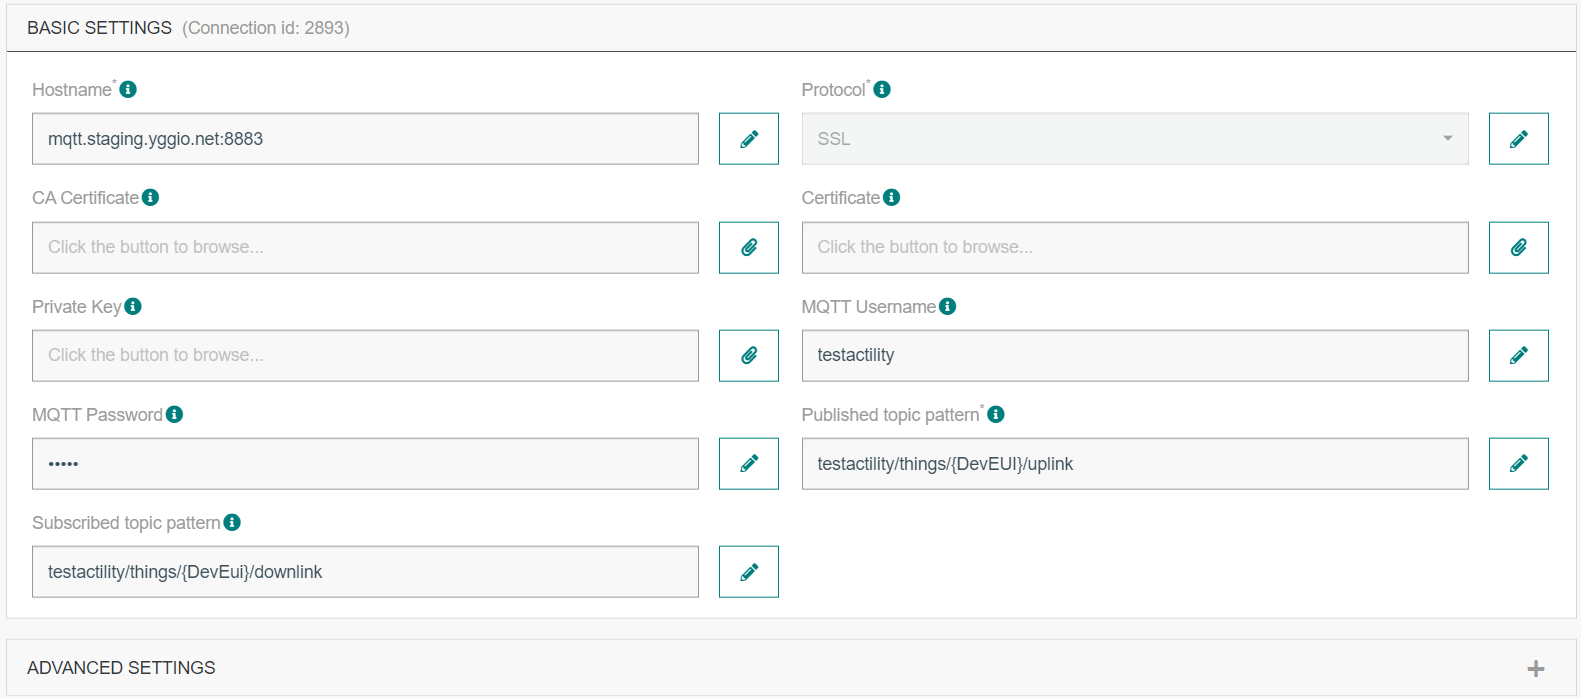 The thingpark MQTT connection setup details that should be updated with correct information
For complete setup instructions, refer to Actility’s official MQTT connector documentation:
https://docs.thingpark.com/thingpark-x/latest/Connector/MQTT/
Verifying the Connector
-
The platform will automatically verify the connection when the connector is created,
but this does not guarantee full functionality. -
To perform a full verification:
- Create a device in the platform using the Actility ThingPark connector.
- After creation, open the device page.
- Go to Tools and check the Synchronize status — it should not say
"never". - Click the Synchronize button manually to confirm it works successfully.
- Log in to ThingPark and confirm that the device has been provisioned.
- Trigger (or wait for) the device’s first uplink.
- Ensure that the uplink is received and properly decoded by the platform.
Import devices:
Once the connector is properly configured, you may want to import existing devices from ThingPark into the IoT platform. This can be done directly from the Connector UI and the platform will always attempt to import all accessible devices.
Multi account setup:
There are two primary ways to integrate ThingPark with the IoT platform. The key consideration is how billing to end users should be handled—via ThingPark, via the IoT platform, or a combination of both. If your users will access the IoT platform directly, you must configure Organization Manager to ensure each user only sees the devices they’re authorized to access.
Integration Options
-
Billing through ThingPark or both systems:
Mirror the ThingPark organization structure in the IoT platform.
Create one connector per Netmore customer. -
Billing through the IoT platform only:
Use a flat setup in ThingPark, with all devices managed in a single location.
Only one connector is needed in the IoT platform.
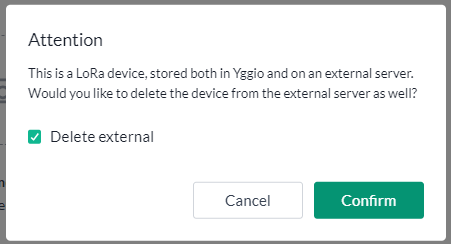
⚠️ Important:
If a device is deleted from the IoT platform, it will by default also be deleted and decommissioned from the ThingPark LoRaWAN server. To avoid this, make sure to opt out of the delete action when prompted during the confirmation dialog.
Troubleshooting
Device Provisioning Fails
A red error message (toaster) appears when adding a new device, and price models do not show up. This typically indicates an issue with your URL, credentials, access rights or Target Profile Identifier. Eliminate these one at a time:
- Double-check the URL—make sure there’s no trailing
/at the end. - Verify that the Username, Password, Target Profile Identifier and Access permissions are correct.
If above does not reveal the issue:
- Go to the DX API URL:
https://dx-api.thingpark.com/(or your operator’s custom DX API URL) - Try to log in using your username and password.
- If login fails or no token is returned:
- Contact your ThingPark provider to confirm the correct credentials and Target Profile Identifier.
I get no data when the device sends uplinks
Likely root cause is mismatch or misconfiguration in the MQTT export setup between ThingPark and Yggio. Go to the sensor in the ThingPark portal.
- Confirm the MQTT topics match on both the ThingPark side and IoT Platform side.
- Double-check the MQTT username, password, and base topic.
- Ensure that SSL and port settings (
mqtt.[staging.yggio.net]:8883) are correctly configured.
ThingPark MQTT documentation: https://docs.thingpark.com/thingpark-x/latest/Connector/MQTT/
I have an API Gateway between me and ThingPark — what should I do?
- Ensure the API gateway gives access to both the ThingPark API and that ThingPark gets access to the IoT platform MQTT broker.
- When creating the connector, update the API URL to point to the gateway endpoints that route correctly to ThingPark.
- An API gateway may use organization specific certificates that may need to get added to the IoT platform, contact Sensative support to add the required certificates.
I get a 40x error when trying to import or create devices — what could be the issue?
- A 40x error means ThingPark is rejecting the request. This is usually caused by:
- Incorrect credentials
- Wrong URL
- Missing or incorrect access rights on the ThingPark side
- Go through the setup again and verify the following:
- Username, password, API URL
- Target Profile Identifier
- Also confirm:
- The user accounts access rights
I still get a 40x error even after following the steps above. What now?
- If everything looks correct in your ThingPark account, proceed with advanced troubleshooting:
- Go to the DX API URL:
https://dx-api.thingpark.com/(or your operator’s custom DX API URL) - Try to log in using your username, password and Target Profile Identifier.
- If login fails, contact ThingPark support—API authentication may not be fully configured on their end.
- If login succeeds, test other endpoints to confirm your access rights via the API.