Map
The Map widget puts a map on the dashboard with your devices on it, outdoor or indoor. It shows a map view you have already saved, so the filters, columns of device values and colour thresholds you worked out on the Map page come with it.
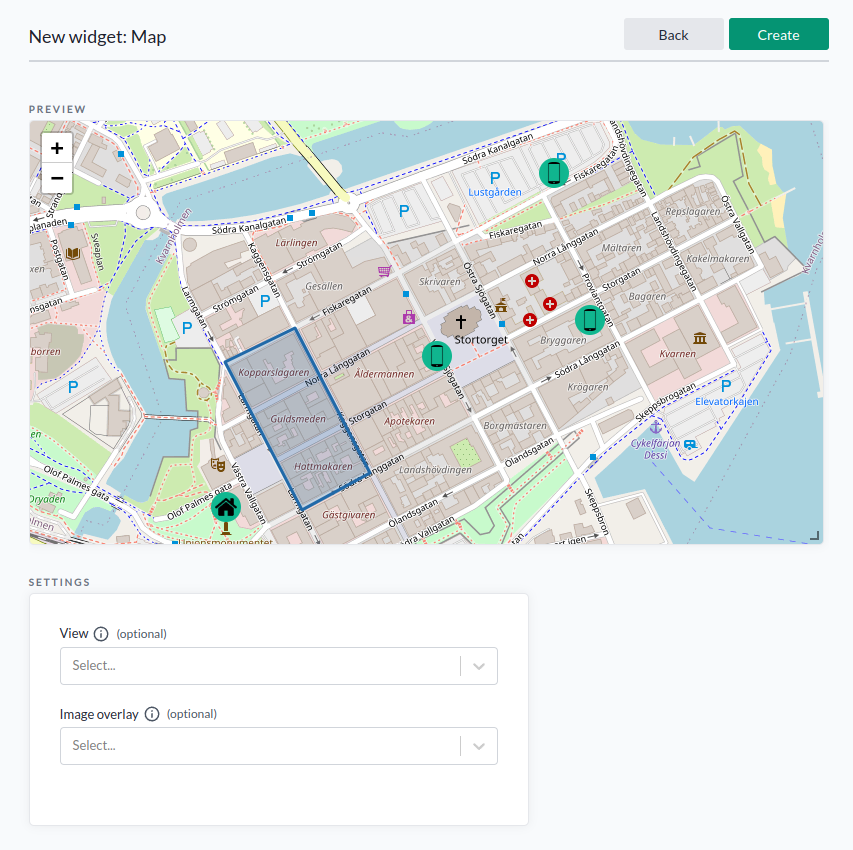
Devices that move are shown here too, at their current position; the Map draws no trail behind them. To see where a device has been, use the Geomap widget. For markers placed by hand on a building drawing, use the Floor plan widget.
Widget settings
| Setting | What it does |
|---|---|
| View | The saved map view to display. Views are created on the Map page |
| Image overlay | An optional geotagged image drawn on top of the map. Pick an existing one or upload a new one - see Overlay images |
| Show create geofence option | Adds the control for drawing a geofence on the widget |
A view that has been deleted since the widget was configured is reported as no longer existing, with a button to clear it.
Overlay images
An overlay image is a picture pinned to real coordinates, so a floor plan sits in its true place on the map with devices at their actual longitude and latitude. It is how you get an indoor map that a GPS-derived position lands on correctly.
Upload and geo-reference an image
Image overlay opens a picker listing the map overlay images you already have, with Upload new image for a new one. Uploading is where the image is geo-referenced.
- Press Upload new image.
- Drop the image on the panel, or click to browse. JPEG and PNG are accepted.
- If the file is over 2 MB, pick a compression target - 2, 4 or 8 MB. Only the sizes smaller than your file are offered, and the image is compressed in the browser to at most 4096 px on its longest side.
- Check the Image name. It is filled in from the filename.
- Enter the four corner coordinates: Top right longitude, Top right latitude, Bottom left longitude, Bottom left latitude. All four are required.
- Press Upload. The image is added to the list and selected for the widget.
Preparing the image
The coordinates are WGS84, and the image must be aligned north-south. The platform does not rotate it for you. A floor plan drawn at an angle to north has to be rotated upright before it is uploaded, with its corner coordinates taken from the rotated version.
Most GIS tools will give you the corner coordinates and the rotation. Without one, Google Earth Pro identifies the corners and the rotation, and an image editor such as GIMP rotates the image.
Get the corners right and the drawing lands on the building. Get them wrong and it lands beside it, at the wrong scale, with every device on it.
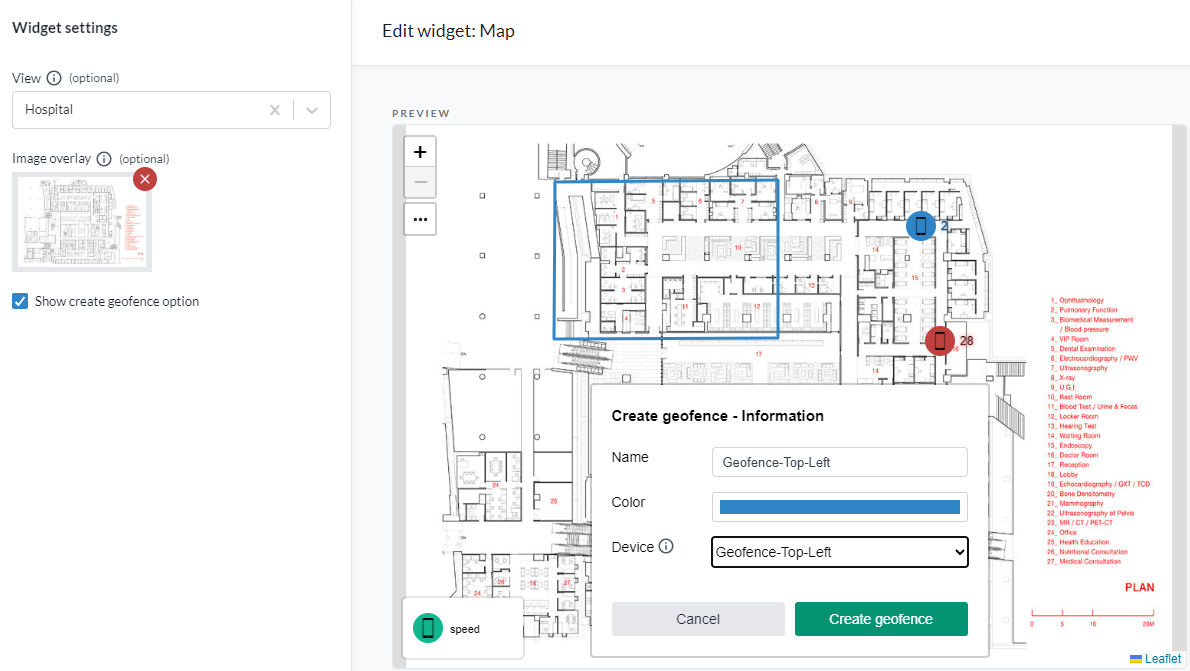
Geofences
With Show create geofence option ticked, geofences can be drawn on the widget from the ...
button, on the map itself or on top of an overlay image.
A geofence is associated with a device, which then receives an event when a device:
| Event | Meaning |
|---|---|
access: enter | A device entered the area |
access: inside | A device updated its position while inside |
access: exit | A device left the area |
Geofences can overlap. Where they do, the devices associated with each of the overlapping geofences all receive their events.
Two things have to be in place for the events to arrive:
- The devices being watched need the
geoQueryflow assigned to them. - Something has to act on the event. The standard
general-geofencetranslator handles the common case; a use case with its own logic needs a translator written for it.
Geofences are also drawn and managed on the Map page.