Lesson 2.1 Rule Engine
The rule engine triggers actions, which can be sending an email or SMS, making an HTTP request, or publishing a message to an MQTT topic. Triggers, conditions and actions are nodes that you drag onto a canvas and connect, which makes it useful for building and visualizing threshold and alarm rules.
Note: This is the new, visual rule engine. Some features from the older rule engine haven't been added yet, see Lesson 2.1 The Rule Engine (Legacy).
In this lesson, we'll cover the following topics:
- Who the rule engine can send an email to.
- How to add a trigger and a condition to a rule.
- How to connect nodes on the canvas.
- How to add an action so a complete rule can run end to end.
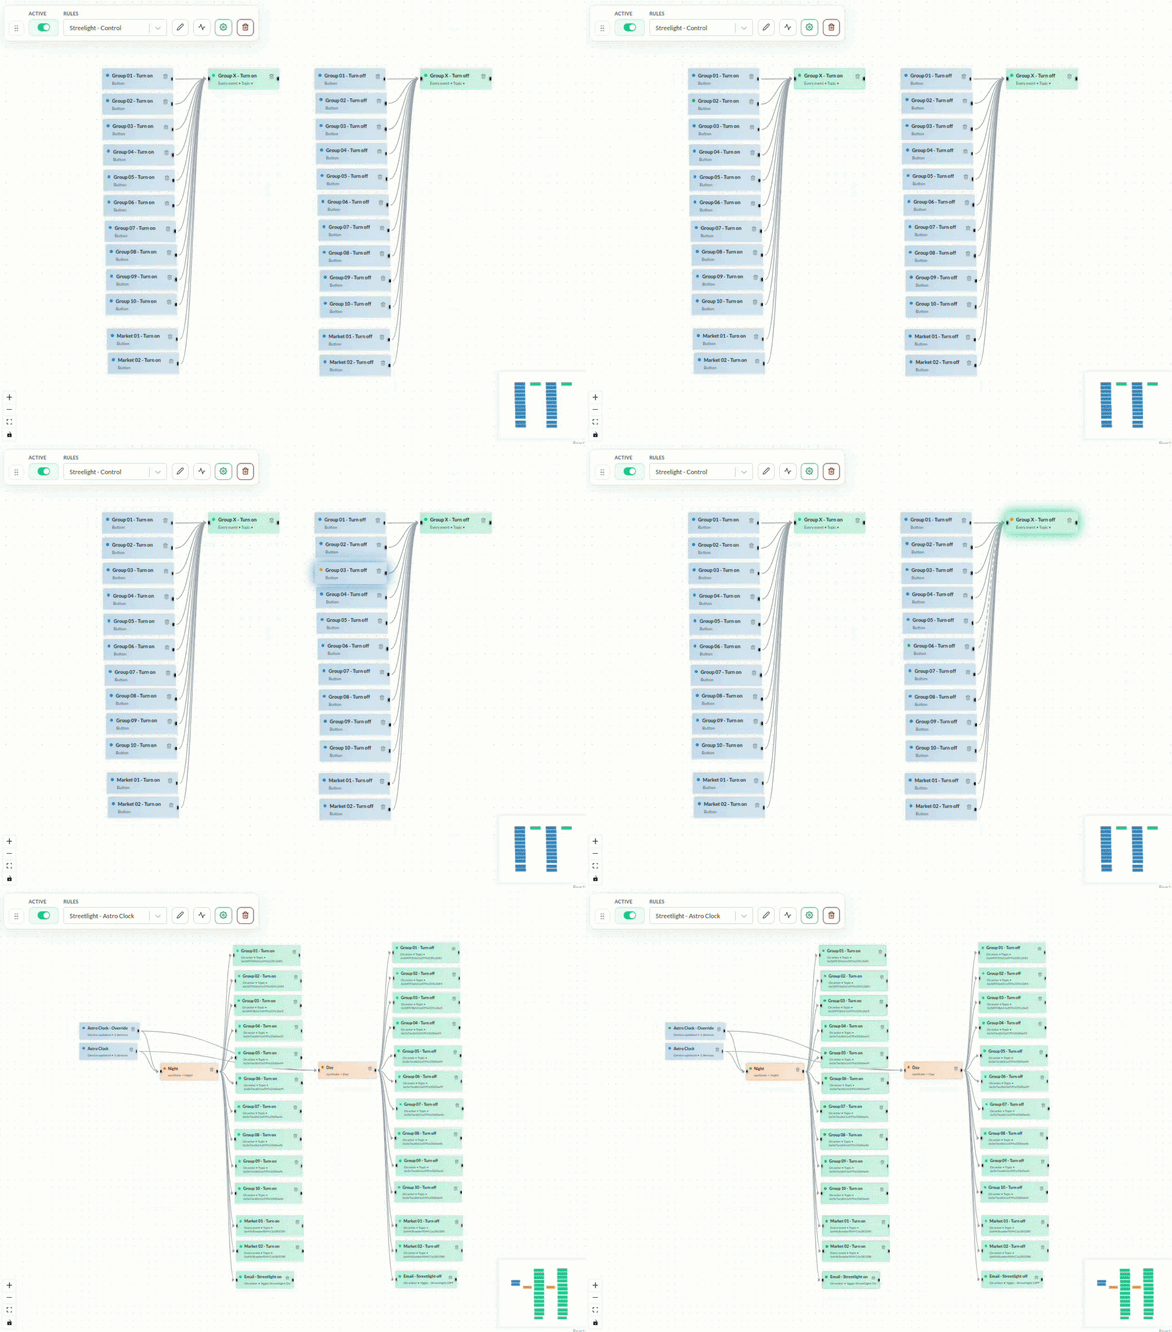
The animation above shows a real (more advanced) rule engine setup: triggers on the left, conditions in the middle, and actions on the right, all connected by lines, with real time updates as data flows through the rule. Your first rule will look like a much smaller version of this.
Create and configure a rule
Start by checking who can be emailed
The rule engine offers the members and external contacts of your organization as recipients, and only those that have an email address recorded.
- Click Organizations in the top bar and open your organization.
- Check that the person you want to email is a member or an external contact, and has an email address.
- Add them first if they are neither - as a member, or under External contacts for someone without a Yggio account. See Organization manager.
Then click Rules in the top bar to open the rule engine.
Example
Start by using the Blank template, then build the rule from these three nodes.
1. Add a trigger
Add a Device updated trigger and select the device you want to monitor, for example a temperature sensor. This trigger fires whenever that device reports a new value.
2. Add a condition
Add a Value threshold condition. The device field is a value name, like temperature. Then choose an operator and a value of the matching type, for example temperature, >, 30.
| Operator | Support | |
|---|---|---|
| = | Equal | Text, Number, Boolean, Null |
| != | Not Equal | Text, Number, Boolean, Null |
| > | Greater than | Text, Number |
| >= | Greater than or equal | Text, Number |
| < | Less than | Text, Number |
| <= | Less than or equal | Text, Number |
| Contains | Text, list | |
| Does not contain | Text, list |
3. Add an action
Add a Send email action. This requires an email connector; pick one of the organization members or external contacts offered in the recipient list, or enter an email address directly, and give the email a title.
4. Connect the nodes
Hover over the black dot on the trigger node until your cursor turns into a crosshair, press and hold the primary mouse button, then drag to the black dot on the condition node and release. Repeat to connect the condition to the action. The flow runs left to right: trigger → condition → action.
5. Save the rule
Press Save in the top right corner. Your rule is now active: whenever the selected device reports a temperature above 30, you'll receive an email.
Alternative triggers
Instead of Device updated, you can use:
- Missing expected report - notifies you when a device stops reporting. Before using it, set an expected report interval on the device: go to Devices → your device → Report interval. Without a report interval set, this trigger has nothing to compare against and will never fire.
- Button - fires when a connected button is pressed. Add a Command Button widget to a dashboard and select this rule's button trigger to activate it.
Viewing rule history
Every rule keeps a log of its past executions, which is useful for confirming your rule actually ran as expected, and for troubleshooting when it doesn't. Try it now:
- In the rule's toolbar, press the pulse icon, next to the edit (pencil) and settings (gear) icons.

- The history log opens, showing each execution's status, timestamp, execution ID, evaluated conditions, and result.
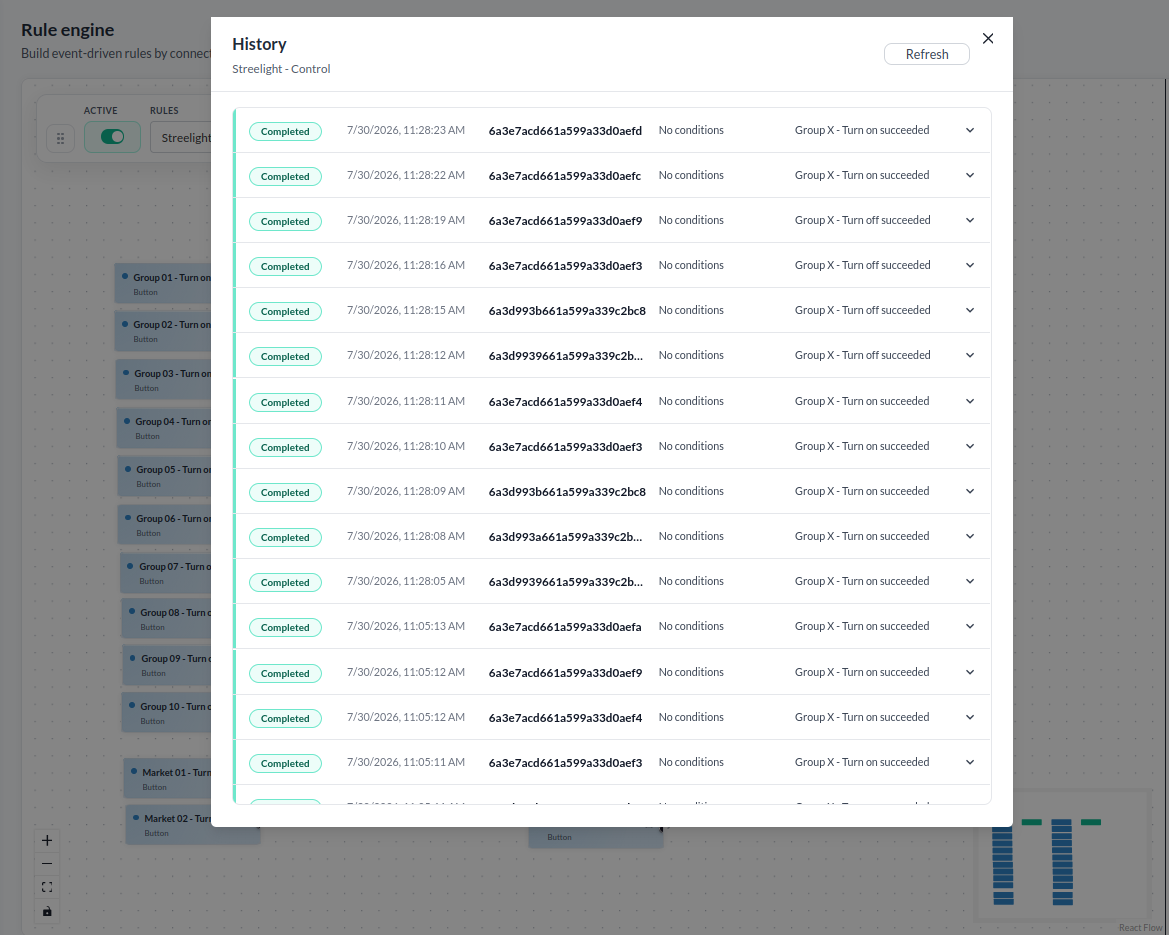
- Press the chevron on an entry to expand it for more detail.
- Press Refresh to check for the latest executions.
For more details, see Rule Engine.