WhatsApp Connector
This guide explains how to create and configure a WhatsApp connector in Yggio. Currently, only the Twilio provider is supported.
Overview
- WhatsApp connectors enable sending WhatsApp messages via rule actions.
- You must have a Twilio account with WhatsApp messaging enabled.
- Required fields are validated in the UI.
- You can optionally specify a backup email address for failed WhatsApp delivery (if an email connector exists).
Twilio Setup Requirements
To use WhatsApp with Twilio, you must complete the following steps:
- Sign up for a Twilio account and verify your email and phone number: https://www.twilio.com/try-twilio
- Request WhatsApp access in the Twilio Console (WhatsApp > Senders > Request Access).
- Register your business and WhatsApp-enabled phone number with Twilio.
- Wait for Twilio approval and number activation (this process may take several days).
- Set up a WhatsApp sender (your approved number) in the Twilio Console.
- Get your Account SID and Auth Token from the Twilio Console dashboard.
- Use the approved sender number as the “From” field in your connector configuration.
- (Optional for testing) Use Twilio’s WhatsApp Sandbox to send test messages before your number is fully approved.
For detailed instructions, see the Twilio WhatsApp Quickstart.
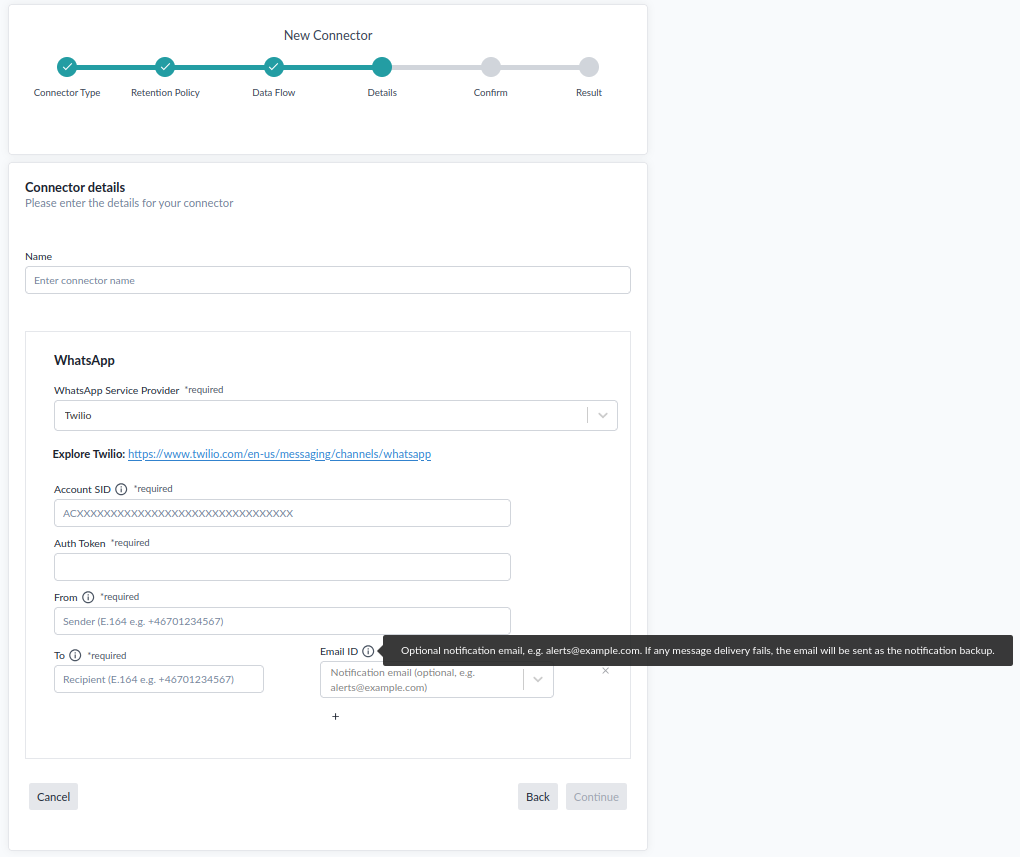
Creating a WhatsApp Connector
- Go to the Connectors section in the Control Panel (
/control-panel-v2/connectors). - Click Add Connector and select WhatsApp as the type.
- Choose Twilio as the service provider.
- Fill in the required fields:
- Account SID: Your Twilio Account SID (must start with
AC). - Auth Token: Your Twilio Auth Token (kept secret).
- From: The sender number (must be in E.164 format, e.g.,
+1234567890). - To: The recipient number(s) (must be in E.164 format).
- (Optional) For each recipient, you can specify a backup email address. If WhatsApp delivery fails, the message will be sent via email (requires an email connector).
- Save the connector.
Field Details
| Field | Description | Required | Validation |
|---|---|---|---|
| Account SID | Twilio Account SID (starts with AC) | Yes | Must start with AC |
| Auth Token | Twilio Auth Token (secret) | Yes | Non-empty |
| From | Sender number (E.164 format) | Yes | Must be valid E.164 |
| To | Recipient number(s) (E.164 format) | Yes | Must be valid E.164 |
| Backup Email | Email address for fallback (optional) | No | Must be valid email |
Example
- Account SID:
ACXXXXXXXXXXXXXXXXXXXXXXXXXXXXXXXX - Auth Token:
your_auth_token - From:
+46700000000 - To:
+46710000001 - Backup Email:
user@example.com(optional)
Notes
- Only Twilio is supported as a WhatsApp provider at this time.
- All numbers must be in E.164 format (e.g.,
+1234567890). - You can add multiple recipients, each with an optional backup email.
- You must have a valid Twilio account with WhatsApp enabled.
Screenshots
Messaging Statistics
On the saved connector page, you will see a statistics panel showing:
- Total Sent: Number of messages successfully sent.
- Total Fails: Number of failed send attempts.
- Sent This Month: Number of messages sent in the current month.
- Success Rate: Percentage of successful deliveries.
- Attempts: Total number of send attempts (successes + failures).
- Last Sent: Timestamp of the most recent successful send.
- Last Failed: Timestamp of the most recent failed send.
- Last Error: The latest error or warning message, if any, with timestamp.
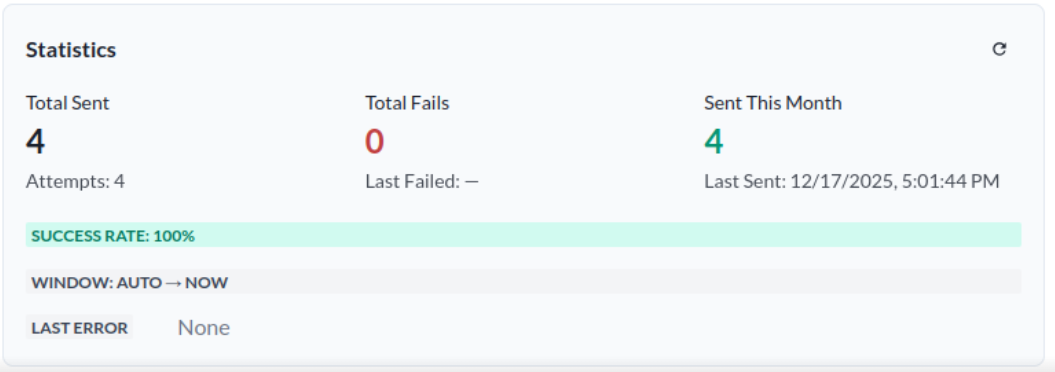
These statistics help you monitor the health and performance of your connector.
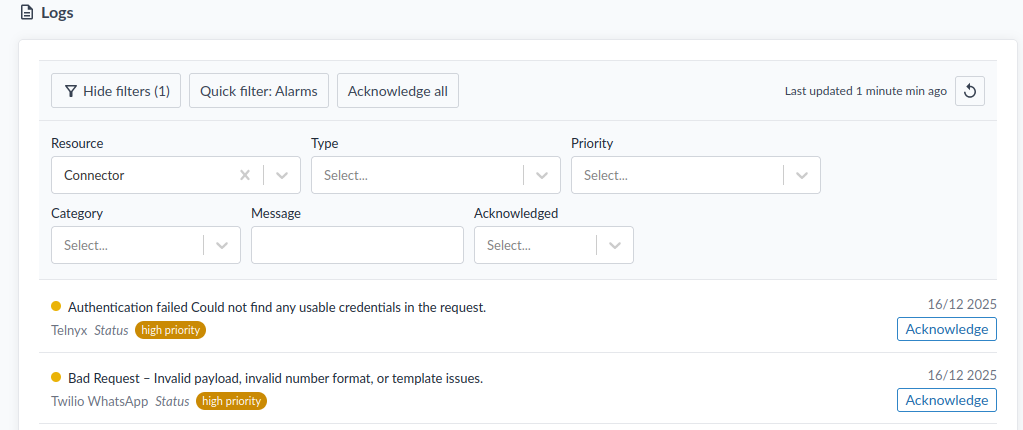
Error Logging
If the connector fails to send a WhatsApp message, an error log will be displayed in Logs under Resource → Connector. You can review these logs to diagnose and resolve issues with your connector configuration or Twilio account.